Setting up a Cloudflare account
Cloudflare is our preferred service to manage a domain's DNS and security settings. In addition to being able to configure the DNS records for a domain, it can be used to protect a website from malicious traffic from bots and Distributed-Denial-Of-Service attacks.
Whilst it isn't required to use Cloudflare when hosting with SiteRig Cloud, we highly recommend it as you can invite our development team to have access to your account and make important changes to your DNS and security settings on your behalf.
Create a new account
If you already have a Cloudflare account setup for your website you can skip straight to step 6 to invite SiteRig Cloud to manage your account, otherwise follow the steps below:
-
Go to www.cloudflare.com and click on Start for free.

Cloudflare Homepage -
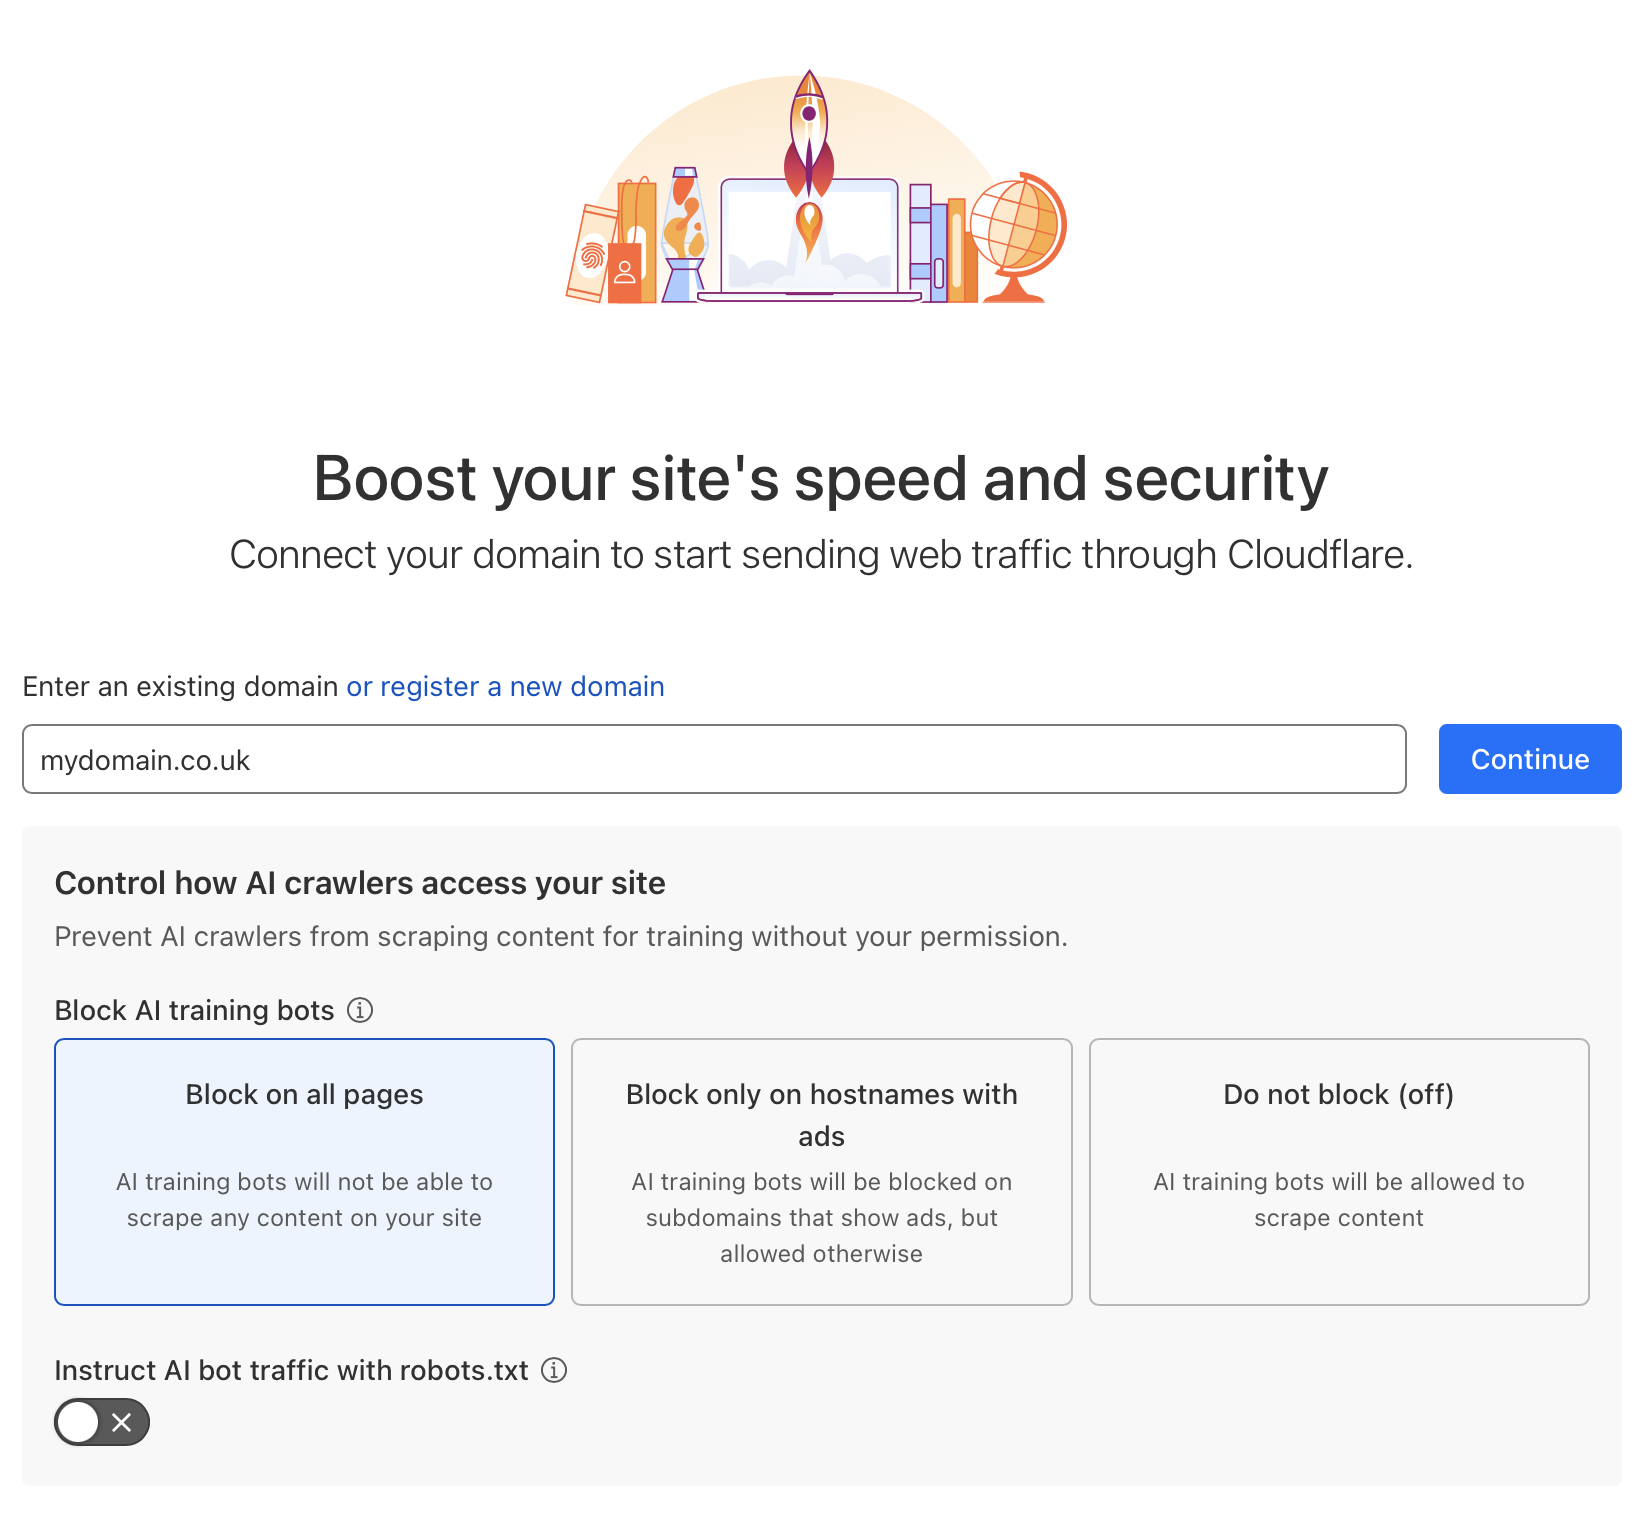
Type in your primary domain name (if you have multiple domains or websites you can enter these later) and decide if you want to block AI training bots from scraping content on your site, these are services like ChatGPT or Claude so unless you want your content to be utilised on those services we recommend selecting Block on all pages.
Un-tick the Instruct AI bot traffic with robots.txt if you're using Yoast SEO or another SEO tool to manage your robots.txt OR if you are not sure.
Add your domain -
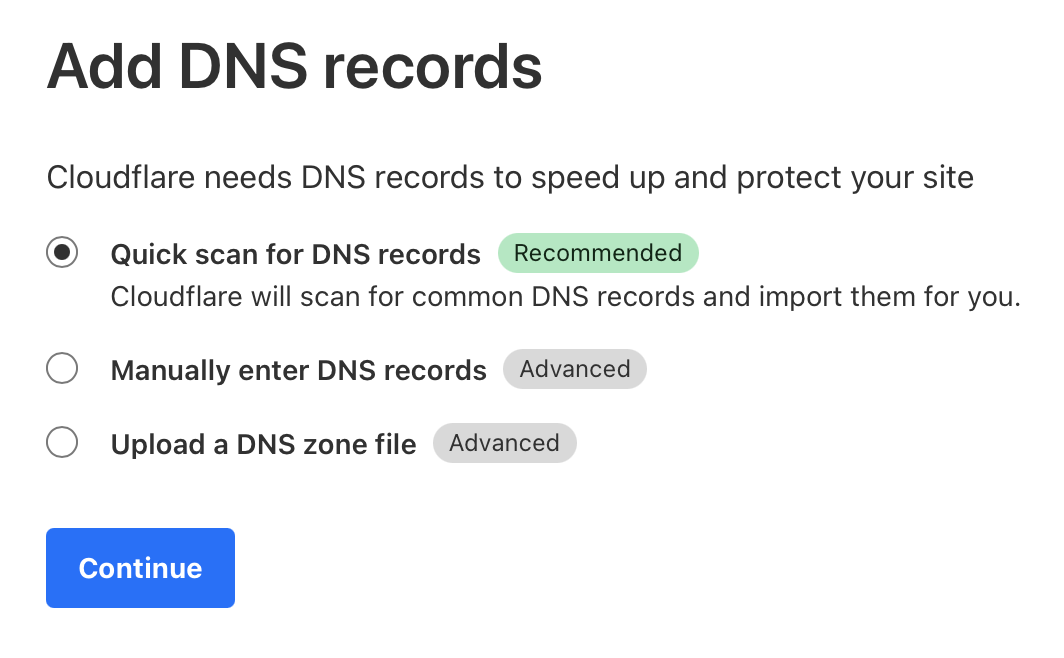
Select Quick scan for DNS records and then Continue.
Note: Not all DNS records will be picked up by the automatic scan, don't worry though, we can help you add in the missing ones
Quick scan your DNS records -
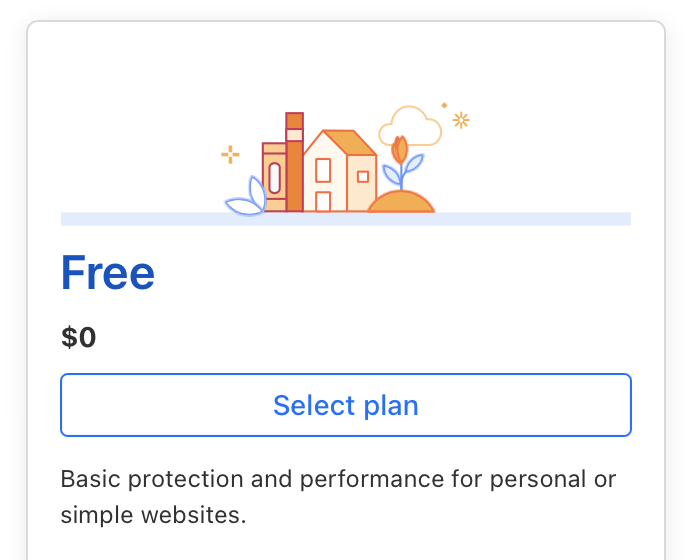
Select the Free plan which has all the features that you'll need for now.
Free plan -
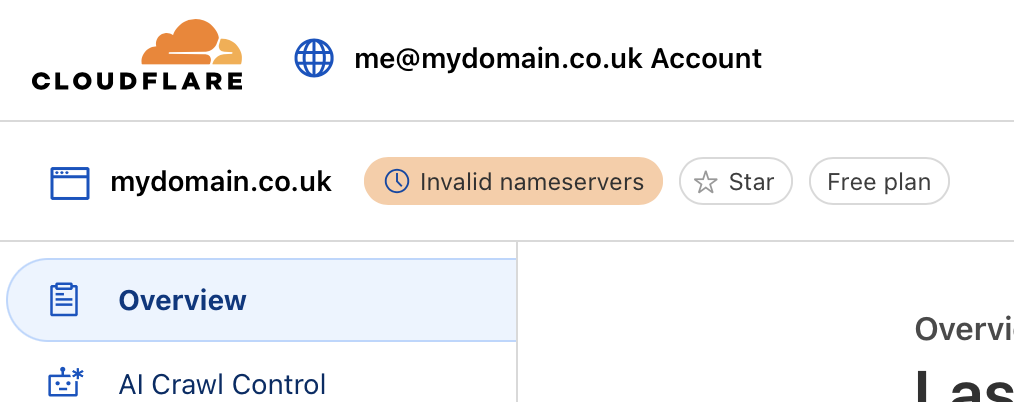
On the next page ignore the message about activation and click on your account name at the top of the page next to the Cloudflare logo to go to the main dashboard.
Domain overview page -
Scroll down the sidebar on the left side of the page and click on Manage Account and then Members.
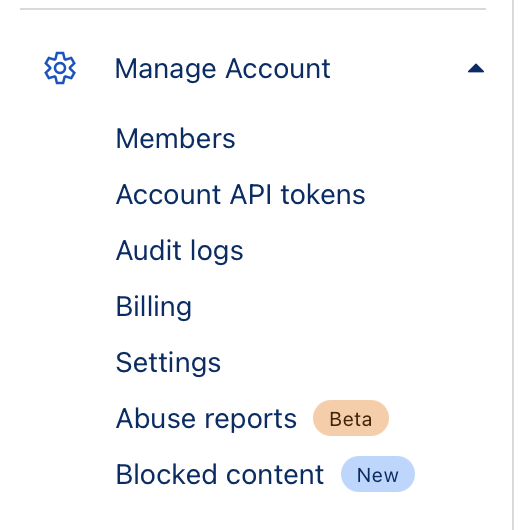
Manage account menu -
For maximum security we recommend following Cloudflare's steps for enabling 2FA on your account. Once you've done that you'll be able to require that Members have 2FA enabled by turning on Member 2FA enforcement.
Click the Invite button to add SiteRig Cloud's development team to your account.
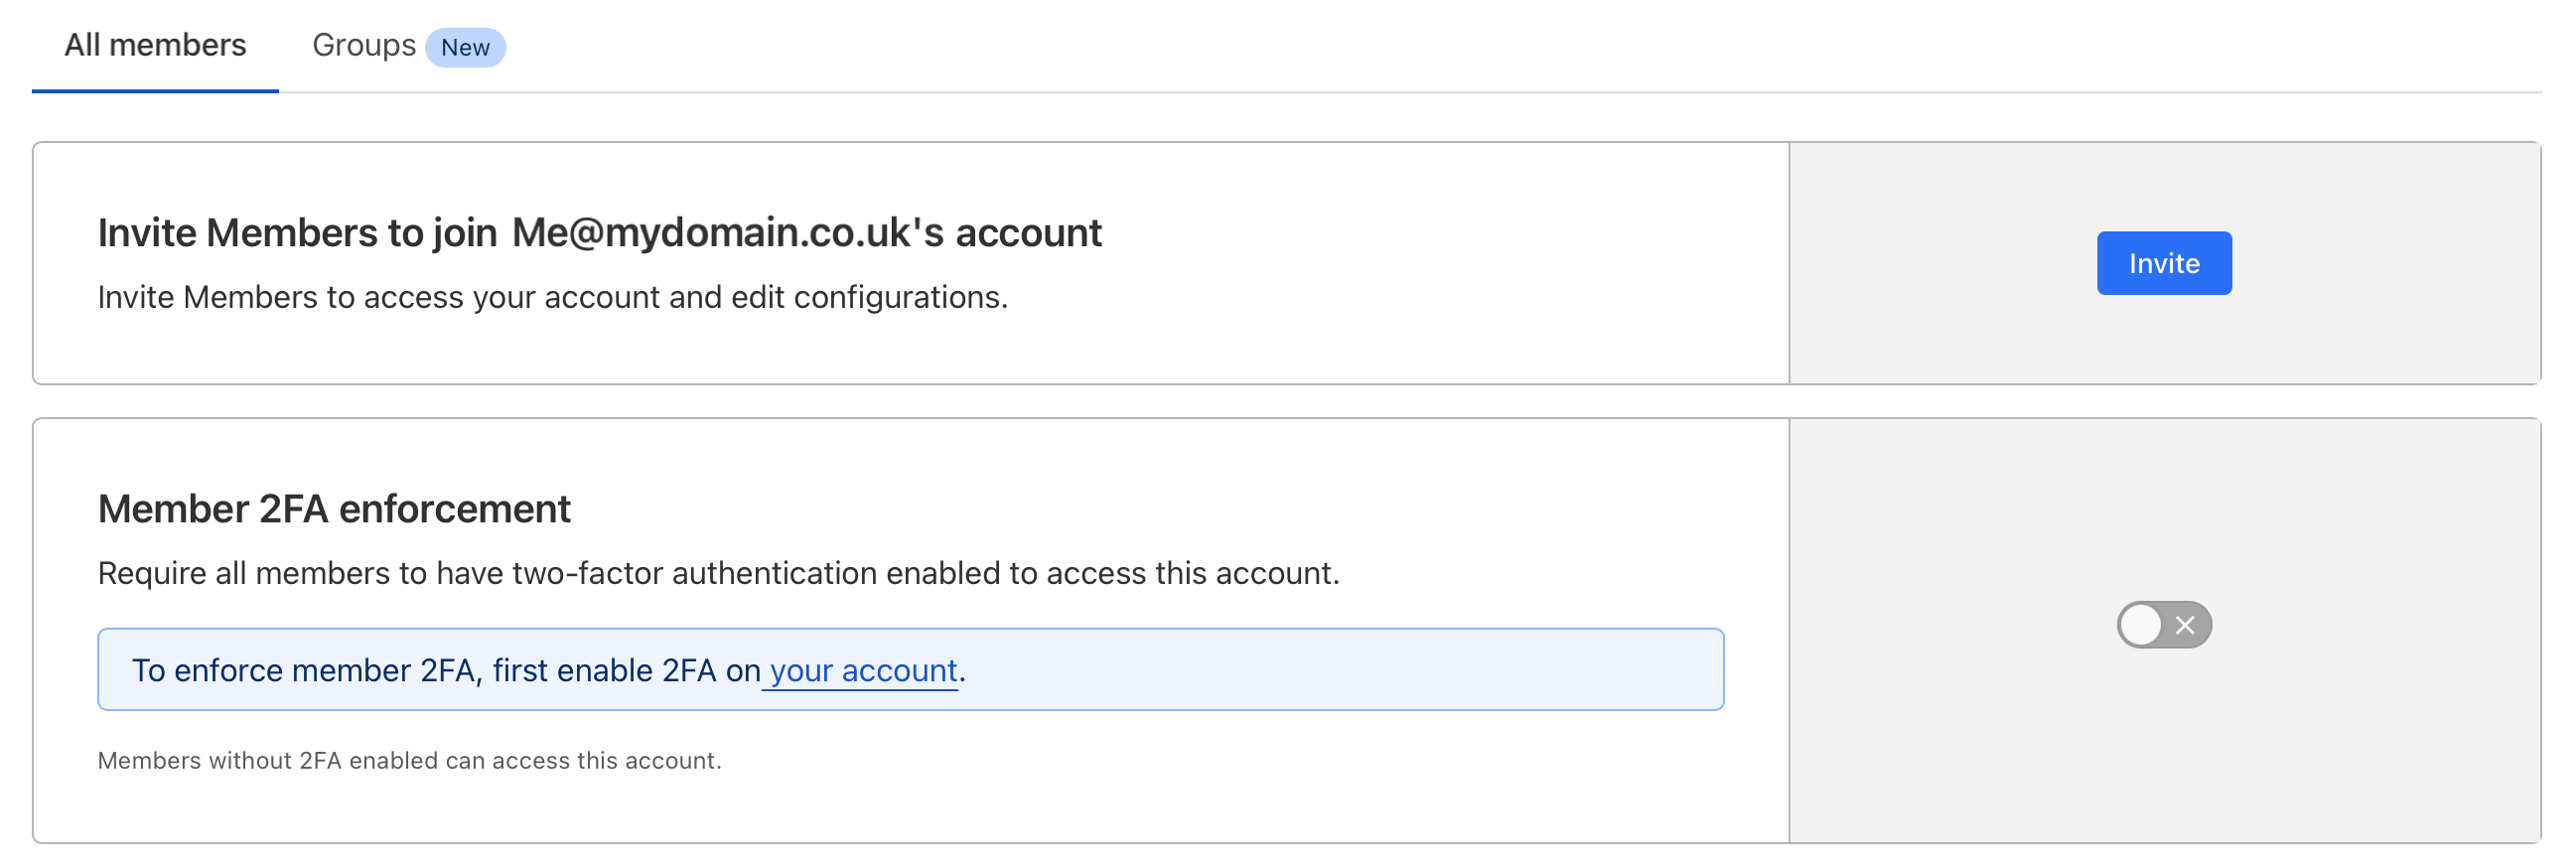
Inviting Members to join your account -
In the Invite members field type developers@siterig.co.uk and then click Add.
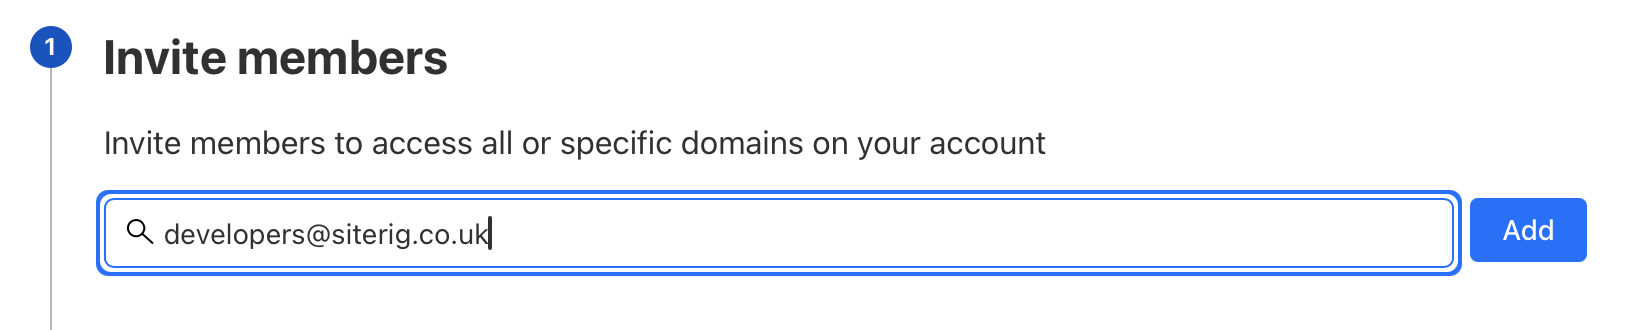
Invite members Then in Scope select either All domains OR select the individual domains you'd like us to have access to.

Specify domains we should have access to In Account Scoped Roles select Administrator and then click on Continue to Summary followed by Invite.
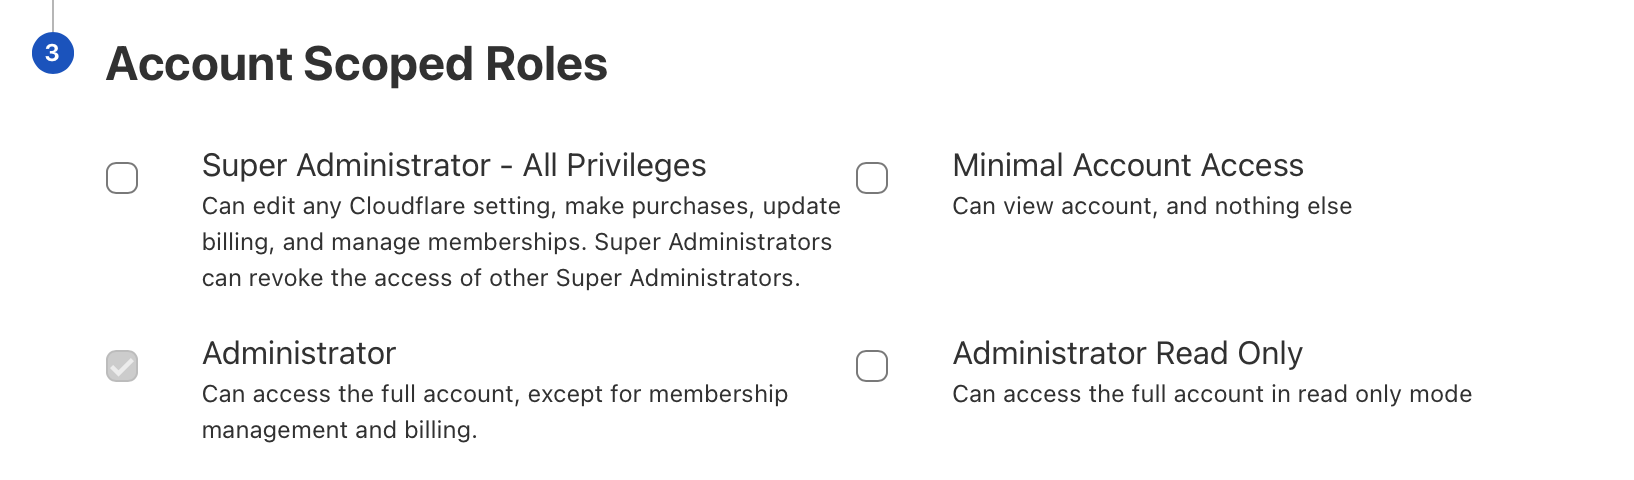
Assigning a role
- That's it! We'll do the rest. If we need any further information we'll contact you directly.


